Teams
Create teams, invite members, assign roles, and collaborate on shared models, assets, and components inside a dedicated team space.

01 / Overview
What Teams Are
The Teams section in the Workspace lists teams you've created and teams you've been invited to. Each team is a separate collaborative space with its own members, models, assets, and components - kept independent from your personal workspace so projects stay organized and private to the right group.
02 / Create a Team
Creating a New Team
Starting a team takes three steps from the Workspace.
- Open New Team. In the Teams section of your Workspace, click New Team.
- Name the team. Enter a name in the dialog that appears. Pick something short and recognizable - it's how members find the team.
- Confirm. Click Create to finish, or Cancel to discard. The team appears in your Teams list right away and you become its first member.

Once created, the team appears in the Teams list alongside any teams you've been invited to.

03 / Inside a Team
The Team Space
Open a team from the Teams list to reveal its dedicated space. The top menu inside a team exposes everything you need to run the group:
Team Assets
Shared fonts, vector graphics, and images available to everyone in the team.
Team Components
Reusable model parts team members can drop into their own projects.
Team Members
Invite people, adjust roles, and remove members.
Team Settings
Edit the team name, description, and color. Delete the team if needed.
New Project
Start a new team project - models created here live inside the team, not your personal space.
Assets, components, and projects inside a team are separate from what's in your personal workspace - only team members with the right role can see or edit them.
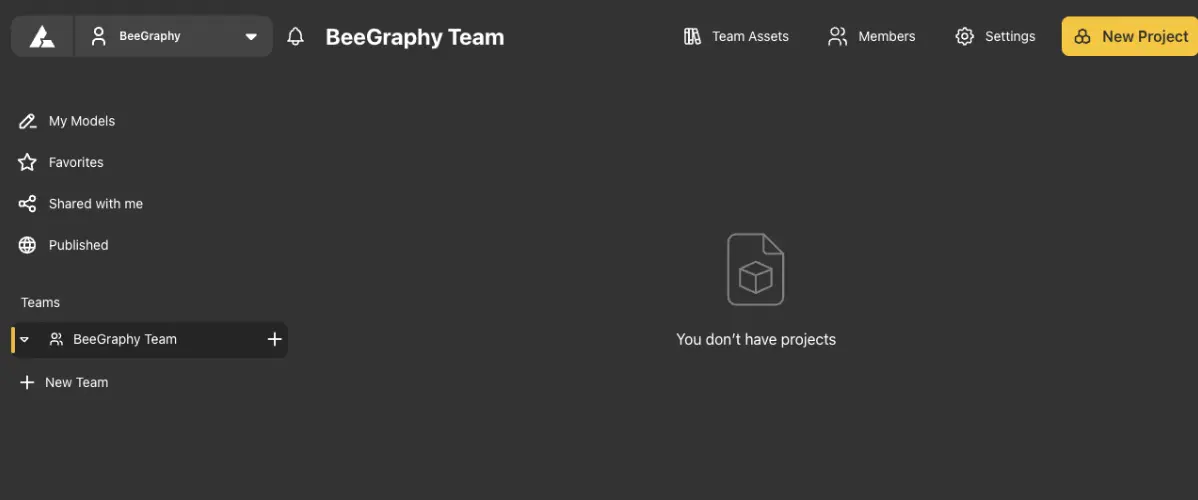
Inside a team space
04 / Team Settings
Editing the Team
Click Team Settings from the team's top menu to open the settings panel. From here you can rename the team so the new name propagates to every member's Teams list, add a description so members understand what the team is for, and set a team color for quicker visual identification across your workspace.
Click Save to apply changes. Closing the panel without saving discards what you edited.
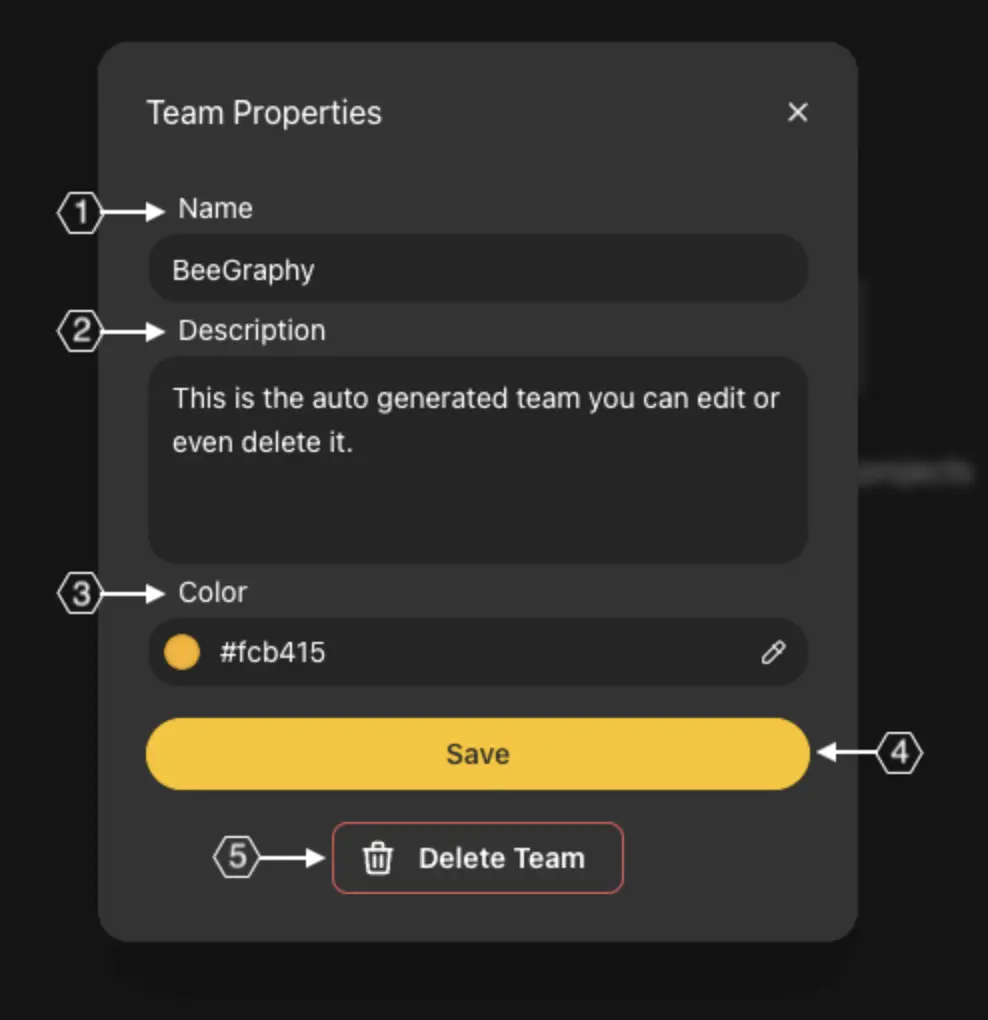
Editing team properties
05 / Members
Managing Members
The Members section lists everyone in the team. Initially it shows only the team creator.
Inviting members. Click Add Members, enter the email address of the person you want to invite, and pick a role (Viewer or Editor). The email must match the one they used to register on BeeGraphy. Click Invite to send, or Cancel to discard.
Changing a role. Click a member's current role in the list and pick a new one. The change applies immediately.
Removing a member. Click Remove next to the member's name and confirm. They lose access to the team space, but their contributions stay.
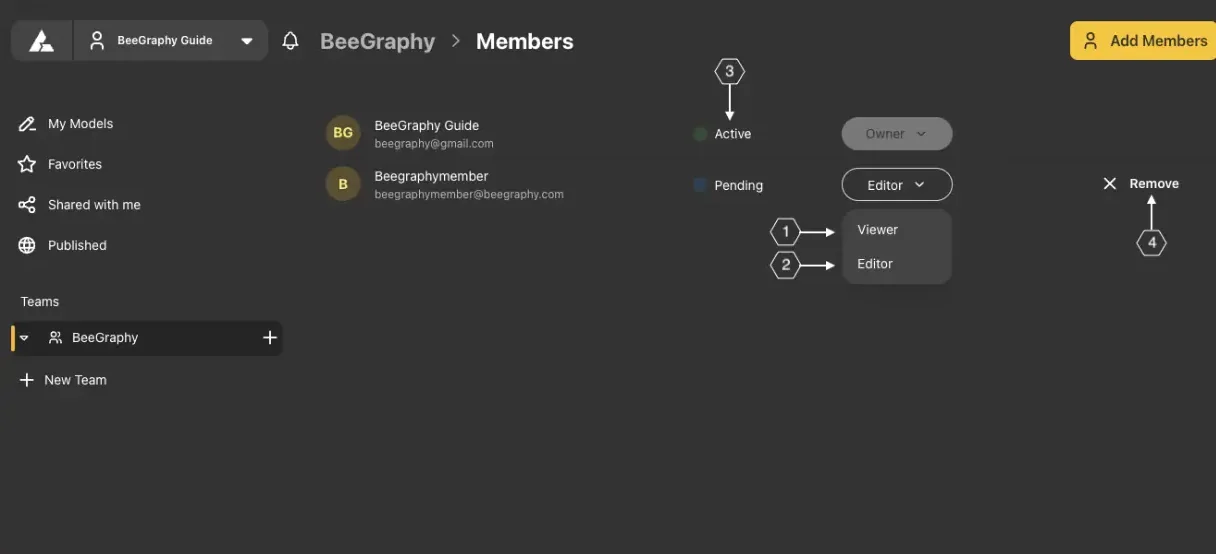
The team members list
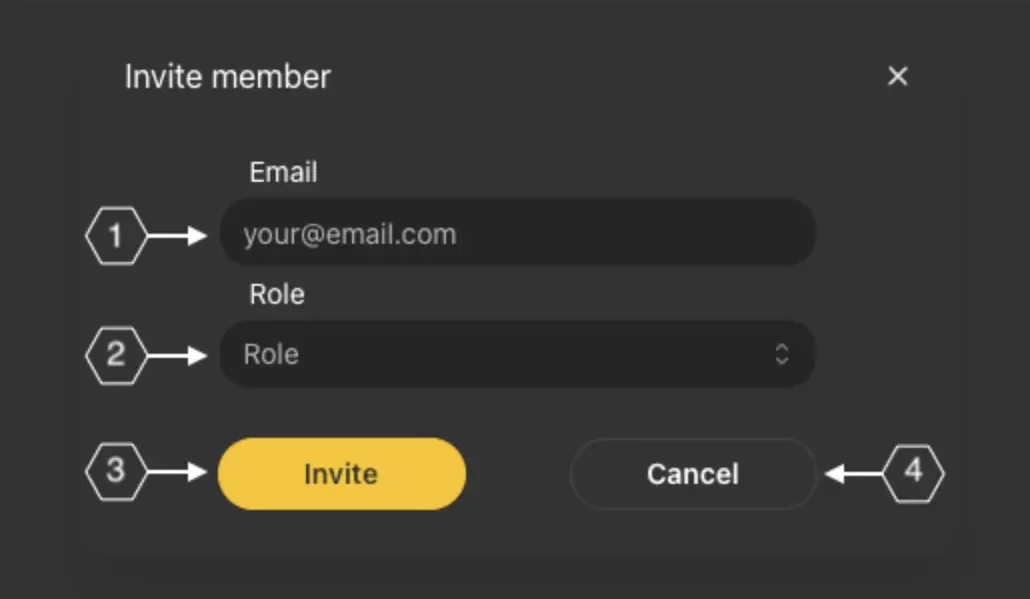
Inviting a member by email
06 / Roles
Member Roles
Teams use two role levels that control what each member can do inside the team space.
Viewer
Limited access. Viewers can open models and adjust dimensions and parameters, but can't alter the node graph or change model structure. Good for clients and reviewers who need to explore the output without editing the logic.
Editor
Full access. Editors can modify the node graph, create and delete models, manage assets and components, and have complete control over team projects.
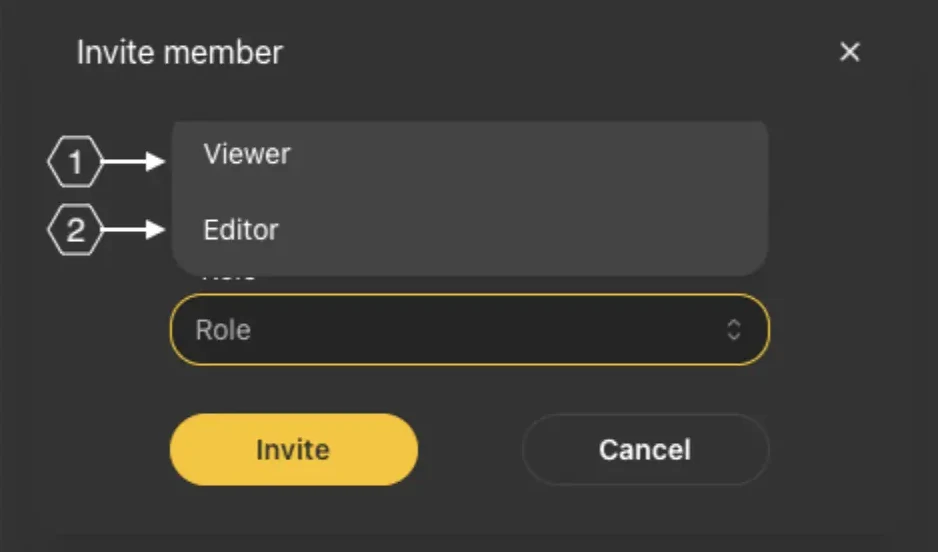
Choosing a member role
07 / Status
Member Status
Each member row shows one of two statuses so you know who's on board and who still needs to accept.
Active means the member accepted the invite and now has team access at their assigned role.
Pending means the invite has been sent but the recipient hasn't accepted yet - resend the invite or check with them if it's been sitting for a while.
08 / Delete
Deleting a Team
Open Team Settings and click Delete Team. You'll be prompted to type the team's name to confirm - a safety check so it doesn't happen by accident.