Model
Create, configure, share, and publish parametric models from your BeeGraphy workspace.
01 / New Model
Creating a Model
Click the New Model button in your workspace to open the creation dialog. Enter a name for the model, then click Create to confirm or Cancel to discard.
- Click New Model in the workspace.
- Enter a model name in the dialog.
- Click Create to open it in the editor.
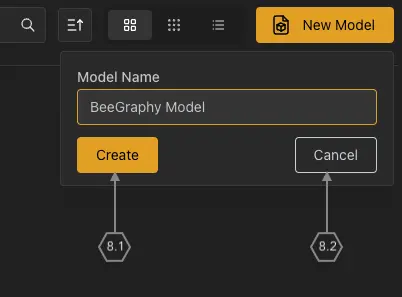
Naming a new model in the creation dialog
Newly created models appear in the My Models section of your workspace. Models here are private by default - only you can access them unless you share or publish them.
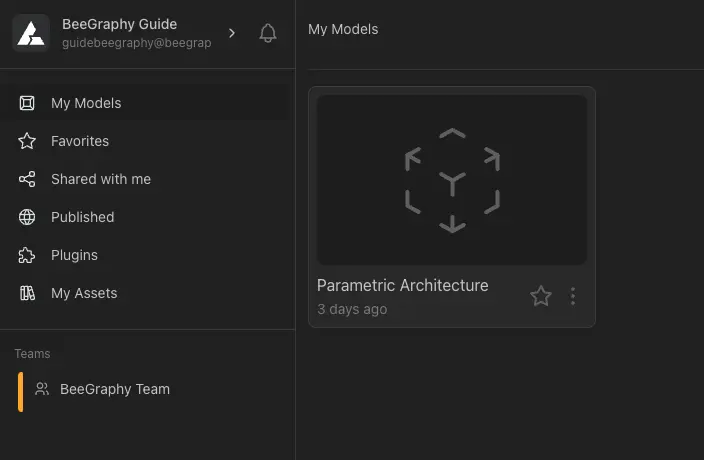
New models appear under My Models
02 / Settings
Model Settings
Each model card in the workspace shows key information at a glance. Open the settings panel via the three-dot menu on any model card.
- Model Name: identifies the model in your workspace and the Market.
- Time Elapsed: how long ago the model was created.
- Star: add the model to your Favorites for quick access.
- Three-dot Menu: opens the full settings panel with all management options.
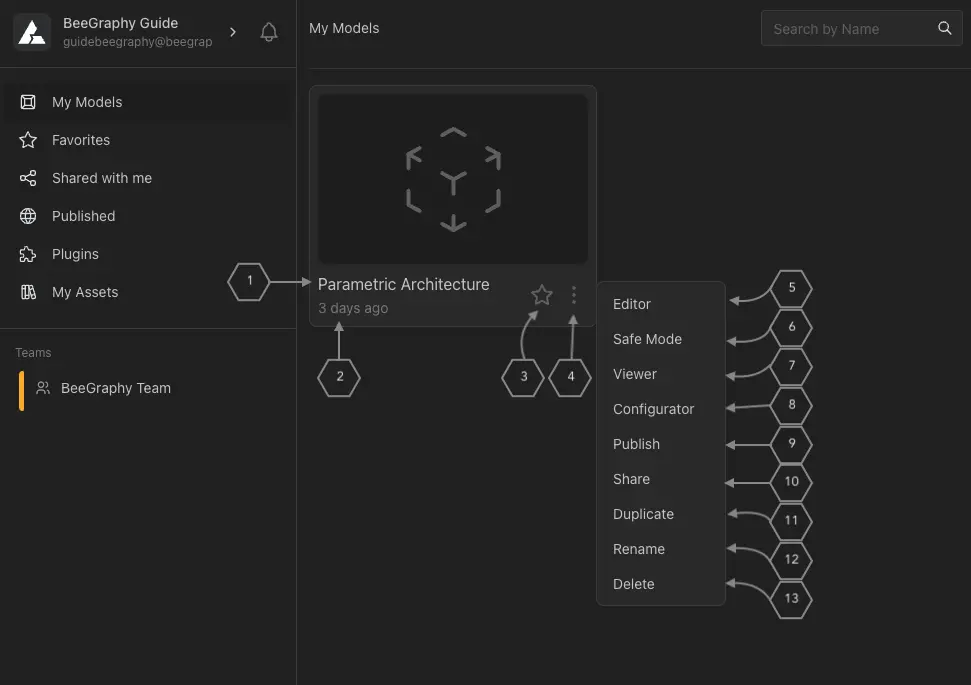
The settings panel opened from a model card
03 / Actions
Model Actions
The settings panel provides quick-launch buttons to open the model in different modes.
- Editor: launches the model in the full Editor for building and editing the node graph.
- Safe Mode: opens the Editor with the solver engine turned off, useful for troubleshooting complex graphs.
- Viewer: displays the model in a read-only Viewer mode without editing capabilities.
- Configurator: opens the Configurator so you can adjust parameters and camera settings.
04 / Sharing
Sharing
Use the Share option to invite other users to your model. Each user is assigned a permission level that controls what they can do.
- Viewer: can view the model and change parameter values only. No editing access to the node graph.
- Inspector: can see the nodes and model inside the Editor but cannot make changes.
- Commentor: can leave comments on the model without editing it.
- Editor: full ability to edit and modify the model, including adding and connecting nodes.
- Configurator: can edit the position and values of input nodes and adjust the model's camera position.
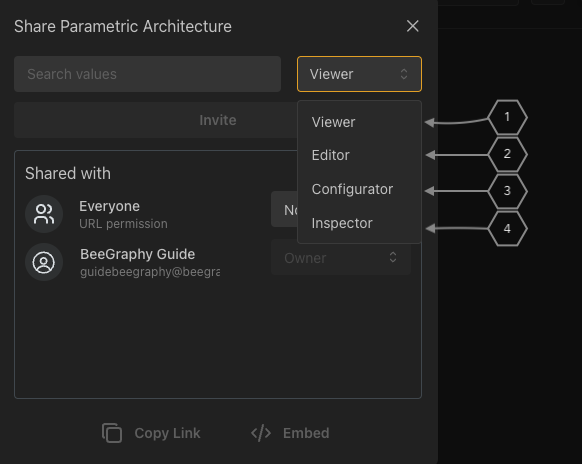
Assigning a permission level when sharing a model
05 / Manage
Manage
Additional model operations are available from the three-dot menu.
- Duplicate: creates an independent copy of the model after a confirmation prompt.
- Rename: updates the model name in your workspace and the Market.
To Delete a model, select Delete from the menu. A confirmation dialog will appear - you must type the exact model name before the deletion proceeds. This action is permanent and cannot be undone.
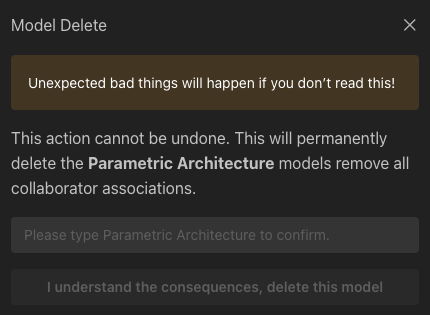
Deletion requires typing the exact model name
06 / Publish
Publishing a Model
Select Publish from the settings panel to make your model available to other users. Fill in the required details before choosing a publishing option.
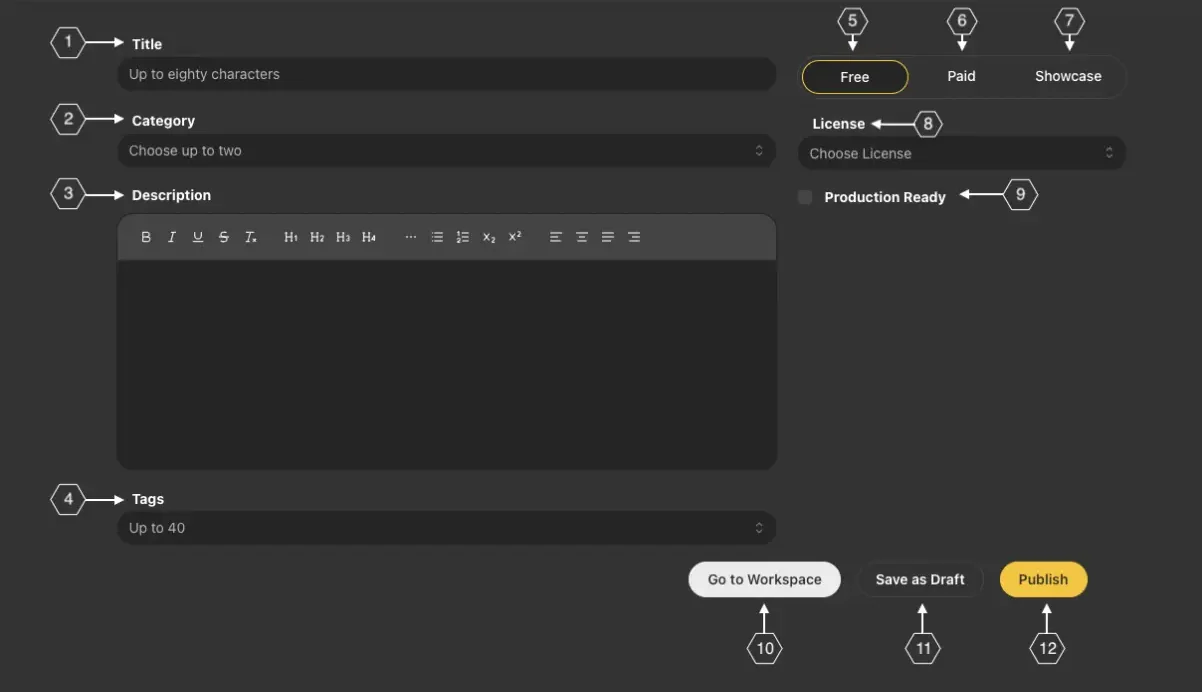
The publish form
Required fields
- Model Name: identifies the model in the Market section.
- Category: select one or two categories that best describe the model.
- Description: a text summary of what the model does or represents.
- Tags: choose from suggested tags or add custom ones to improve discoverability.
- License: select the appropriate license from the provided list.
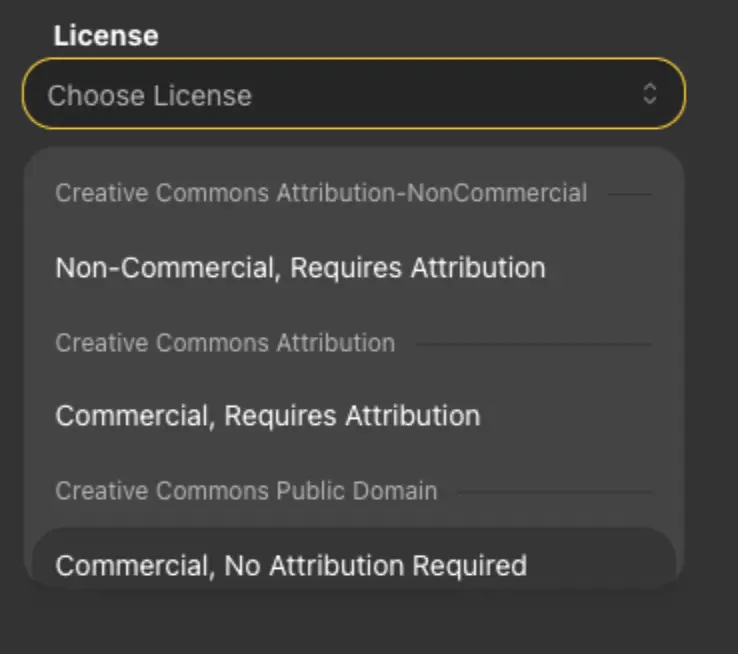
Choosing a license for the model
Publishing options
- Free: the model is freely accessible to all users in the Market section.
- Paid: set a price for the model in the Market. Requires a connected PayPal account.
- Showcase: makes the model visible in your personal Portfolio section only, not listed in the Market.
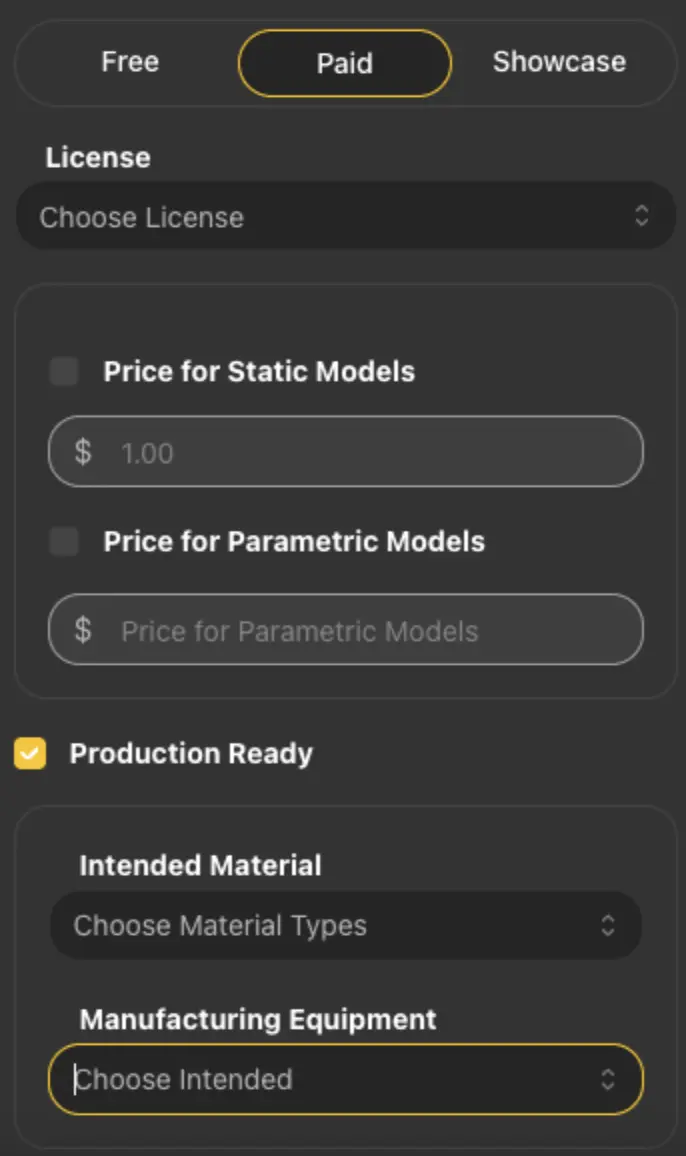
Free, Paid and Showcase publishing options
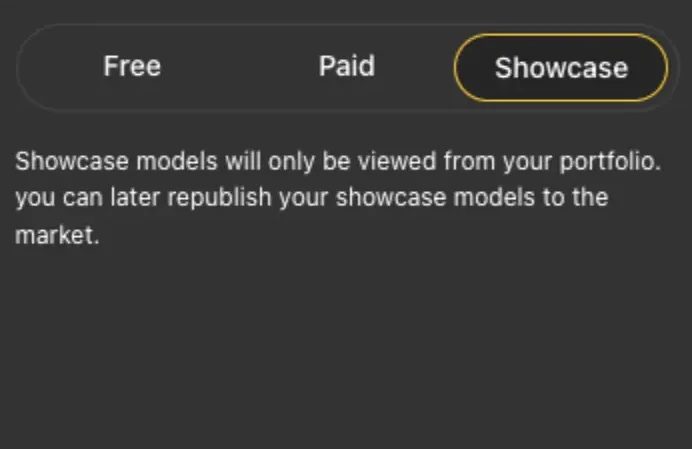
Showcase lists the model in your Portfolio only
Production Ready is an optional toggle indicating the model includes a production-ready file. When enabled, two additional fields appear: Materials and Manufacturing Equipment - select the applicable options from each list.
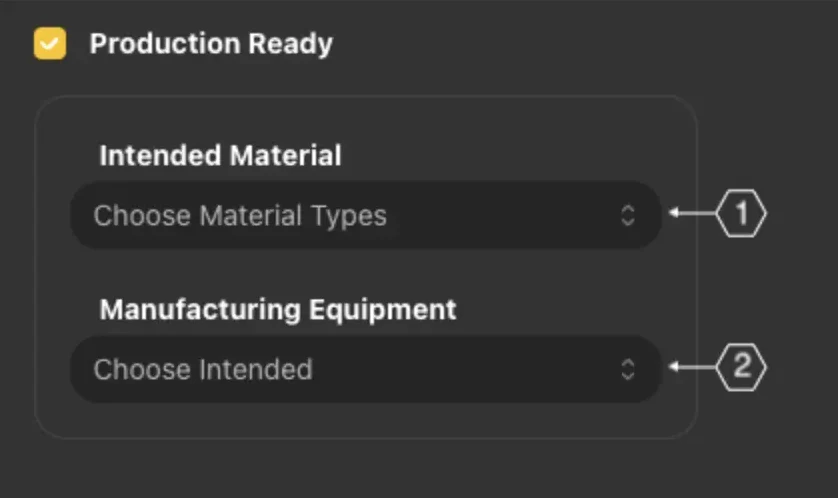
Enabling Production Ready reveals two extra fields
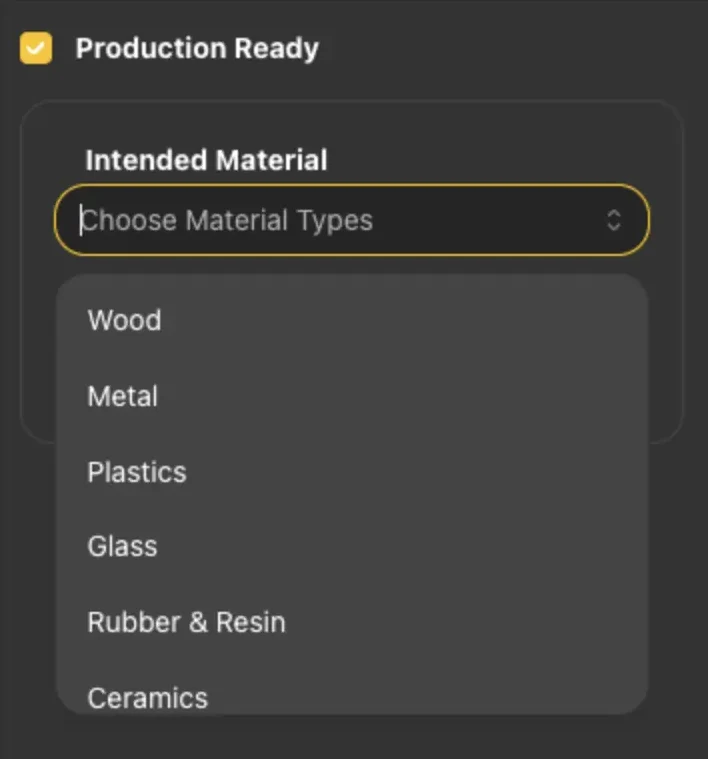
Selecting the intended materials
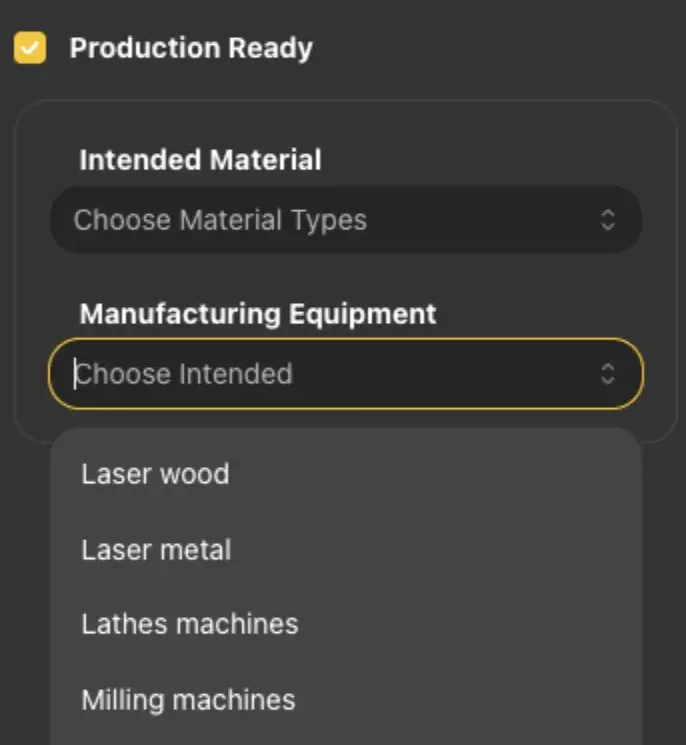
Selecting the manufacturing equipment
Finalizing
- Go to Workspace: return to the workspace without losing any draft progress.
- Save as Draft: preserve all fields for later; the model is not published yet.
Click Publish to make the model live. Once published, it appears in the Market or Portfolio depending on the option selected.